jQuery: Slideshow tự tạo dùng jQuery
Dưới đây là ví dụ về việc tạo Slideshow bằng jQuery.
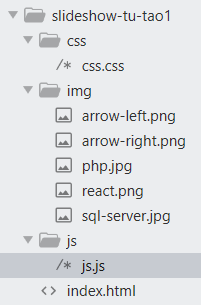
Tổ chức thư mục của ví dụ như sau:
Dưới đây là nội dung của từng file:
File index.html:
<!DOCTYPE html>
<html>
<head>
  <title>Slideshow-tự tạo-V1</title>
  <meta charset="utf-8">
  <link rel="stylesheet" href="css/css.css">
</head>

<body>
  <section class="container">
    <img class="slide" src="img/php.jpg" idx="0" alt="">
    <img class="slide" src="img/react.png" idx="1" alt="">
    <img class="slide" src="img/sql-server.jpg" idx="2" alt="">
  </section>

  <img class="btn-change" id="next" src="img/arrow-right.png" alt="">
  <img class="btn-change" id="prev" src="img/arrow-left.png" alt="">

  <section class="change-img">
    <button class="active" idx="0">1</button>
    <button idx="1">2</button>
    <button idx="2">3</button>
  </section>

  <script src="https://code.jquery.com/jquery-3.5.1.min.js" integrity="sha256-9/aliU8dGd2tb6OSsuzixeV4y/faTqgFtohetphbbj0=" crossorigin="anonymous"></script>
  <script src="js/js.js"></script>
</body>
</html>
File css.css:
img.slide{
   width: 800px;
   height: 600px;
}

img.slide:not(:first-child) {
   display: none;
}

.container{
    width: 800px;
    height: 600px;
    margin: 0 auto;
    border: 2px solid #ccc;
    position: relative;
    padding: 5px;
}

.btn-change{
    width: 30px;
    height: 30px;
    position: absolute;
    top: 50%;
    transform: translateY(-100%);
}

#next{
    right: 10px;;
}

#prev{
    left: 10px;
}

.change-img{
    text-align: center;
    margin-top: 1rem;
}

button{
    background: #658000;
    width: 30px;
    height: 30px;
    border-radius: 50%;
    margin-right: 20px;
    font-weight: bold;
    border: none;
}

button.active{
    background: blue;
    color: white;
}
File js.js:
$(function() {
  var index = 0; //vị trí ảnh
  var endImg = $("img.slide:last").attr("idx"); //ảnh cuối

  var interval;
  var timer = function () {
    interval = setInterval(function () {
      $("#next").click();
    },5000);
  };

  var changeImage = function(index) { //xây dựng hàm chuyển ảnh
    $("img.slide").hide();
    $("img.slide").eq(index).fadeIn(500);
    $("button").removeClass("active");
    $("button").eq(index).addClass("active");

    clearInterval(interval);
    timer();
  };

  changeImage(index); //gọi đến hàm chuyển ảnh để tự động chuyển ảnh

  $("button").click(function() { //nhấn vào các nút tròn ở dưới ảnh để chuyển ảnh
    index = $(this).attr("idx");

    changeImage(index);
  });

  $("#next").click(function() { //nhấn vào mũi tên phải để chuyển ảnh phải
    if(++index > endImg) { //nếu chỉ số > chỉ số ảnh phải cùng
      index = 0; //thì thiết lập chỉ số ứng với ảnh trái cùng
    }

    changeImage(index);
  });

  $("#prev").click(function() { //nhấn vào mũi tên trái để chuyển ảnh trái
    if(--index < 0) { //nếu chỉ số < 0 (tức là trước ảnh trái cùng)
      index = endImg; //thì thiết lập chỉ số ứng với ảnh phải cùng
    }

    changeImage(index);
  });
});
Download source code tại ĐÂY.