VueJS: Hướng dẫn làm website SPA với VueJS+Axios+Laravel
Giải phóng thời gian, khai phóng năng lực
Mục lục bài viết
- Phần 1: Cài đặt cơ bản
- Phần 2: Cài đặt Vue
- Phần 3: Thiết lập cơ bản
- Phần 4: Tạo component Category.vue để hiển thị
- Phần 5: Tạo component StoreCategory.vue để thêm bản ghi
- Phần 6: Tạo component UpdateCategory.vue để sửa bản ghi
- Phần 7: Tạo component ShowCategory.vue để xem bản ghi
Trước tiên các bạn cần nắm được các phương thức xử lý CRUD của axios ứng với các lời gọi đến các phương thức của controller resource. Bạn có thể xem tại bài viết Các hàm cơ bản của axios dùng trong CRUD với Laravel.
Phần 1: Cài đặt cơ bản
Bước 1:
Cài đặt Xampp.
Bước 2:
Cài đặt Composer.
Bước 3:
Vào xamp >> htdocs hoặc một thư mục bất kỳ nơi bạn muốn lưu trữ Laravel và thực hiện hai lệnh sau để cài đặt Laravel:
composer global require laravel/installer
laravel new laravelsetup
Hoặc cài đặt Laravel qua Composer:
composer create-project --prefer-dist laravel/laravel blog
Bước 4:
Sau khi cài đặt xong bạn copy laravelsetup vào xampp >> htdocs rồi đổi tên thành vuespa, sau đó giữ phím Shift và nhấn phím phải chuột chọn Open PowerShell window here.

Kết quả:

Phần 2: Cài đặt Vue
Bước 1:
Cài đặt VueJS thông qua lệnh npm install như hình dưới.

Bước 2:
Cài đặt thêm vue-router và vue-axios:

Bước 3:
Thực hiện lệnh watch để mix và dịch:
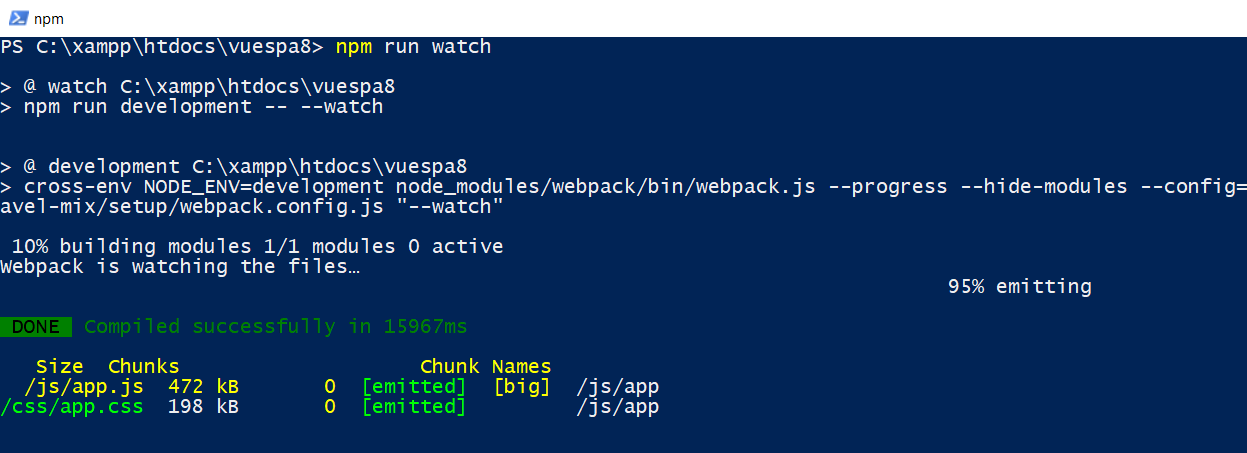
Bước 4:
Mở thêm một PowerShell nữa và thực hiện lệnh php artisan serve để tạo host ảo tại cổng 8000.

Bước 5:
Vào một trình duyệt bất kỳ và gõ vào localhost:8000 hoặc 127.0.0.1:8000. Kết quả:

Bước 6:
Vào resources >> views rồi tạo một view tên index.blade.php sau đó đưa nội dung sau vào:
<!doctype html>
<html lang="{{ str_replace('_', '-', app()->getLocale()) }}">
<head>
<meta charset="utf-8">
<meta name="viewport" content="width=device-width, initial-scale=1">
<title>V1Study - SPA with Laravel-VueJS</title>
<!-- Style -->
<link href="https://fonts.googleapis.com/css?family=Nunito:200,600" rel="stylesheet" type="text/css">
<link rel="stylesheet" type="text/css" href="{{asset('css/app.css')}}">
<link rel="stylesheet" type="text/css" href="{{asset('css/css.css')}}">
</head>
<body>
<h1 style="color: #8ac007;text-align: center;font-weight: bold;">V1Study - SPA with Laravel-VueJS</h1>
<section id="app"></section>
<script src="{{asset('js/app.js')}}"></script>
</body>
</html>
Bước 7:
Từ thư mục routes bạn mở file web.php rồi sửa lệnh trong nó thành như sau:
Route::get('/', function () {
return view('index');
});
Bước 8:
Quay lại localhost:8000 và refresh lại trang, ta được kết quả như sau:

Phần 3: Thiết lập cơ bản
Bước 1:
Dùng Sublime Text mở thư mục gốc vuespa ra, rồi vào resources >> js >> components tạo một component tên App.vue rồi đưa vào nội dung sau:
<template>
<div class="container">
<div>
<transition name="fade">
<router-view></router-view>
</transition>
</div>
</div>
</template>
<style>
.fade-enter-active, .fade-leave-active {
transition: opacity .5s
}
.fade-enter, .fade-leave-active {
opacity: 0
}
</style>
<script>
export default{
}
</script>
Bước 2:
Cũng trong thư mục resources >> js >> components bạn mở file app.js ra rồi đưa vào nội dung sau:
import Vue from 'vue';
import VueRouter from 'vue-router';
Vue.use(VueRouter);
import VueAxios from 'vue-axios';
import axios from 'axios';
Vue.use(VueAxios,axios);
import App from './components/App.vue';
const routes = [
];
const router = new VueRouter({mode:'history',routes:routes});
new Vue(Vue.util.extend({router},App)).$mount('#app');
Bước 3:
Vào phpmyadmin (thường sẽ là http://localhost/phpmyadmin) và tạo một database tên db_vuespa.

Bước 4:
Mở file .env và sửa một phần nội dung thành như sau:
[...]
DB_CONNECTION=mysql
DB_HOST=127.0.0.1
DB_PORT=3306
DB_DATABASE=db_vuespa
DB_USERNAME=root
DB_PASSWORD=
[...]
Phần 4: Tạo component Category.vue để hiển thị
Bước 1:
Mở một PowerShell mới và thực hiện lệnh php artisan make:model Category -m -r. Kết quả như sau:

Lệnh này sẽ tạo 3 thành phần: model có tên Category.php (trong thư mục app), migration (trong thư mục database >> migrations) có tên như ảnh trên, và controller có tên CategoryController.php (trong thư mục app >> Http >> Controllers).
Bước 2:
Vào app >> Providers và mở file AppServiceProvider.php rồi sửa nội dung thành như sau:
<?php
namespace App\Providers;
use Illuminate\Support\ServiceProvider;
use Illuminate\Support\Facades\Schema;
class AppServiceProvider extends ServiceProvider
{
/**
* Bootstrap any application services.
*
* @return void
*/
public function boot()
{
Schema:defaultStringLength(190);
}
/**
* Register any application services.
*
* @return void
*/
public function register()
{
//
}
}
Lệnh có màu đỏ ở trên sẽ có tác dụng thiết lập kích thước mặc định cho dữ liệu kiểu string là 190.
Bước 3:
Mở migration ra và sửa nội dung function up() thành như sau:
public function up()

{

    Schema::create('categories', function (Blueprint $table) {

        $table->increments('id');

        $table->string('categoryName',50);

        $table->integer('categoryRank');

        $table->tinyinteger('status')->default(1);

    });

}
Bước 4:
Quay lại PowerShell và thực hiện lệnh php artisan migrate như sau để tạo các bảng:

Kết quả là ta sẽ tạo được bảng categories.

Và cấu trúc của bảng như sau:

Bước 5:
Bây giờ ta sẽ mở bảng categories ra và thêm vào hai bản ghi:

Bước 6:
Mở model app >> Category.php và sửa nội dung thành như sau:
<?php
namespace App;
use Illuminate\Database\Eloquent\Model;
class Category extends Model
{
protected $fillable=['categoryName','categoryRank','status'];
public $timestamps=false;
}
Bước 7:
Mở controller app >> Http >> controllers >> CategoryController.php và sửa function index() thành như sau:
public function index()
{
$categories=Category::orderBy('categoryRank')->get();
return response()->json($categories);
}
Bước 8:
Mở route routes >> web.php và thêm vào route sau:
Route::resource('category','CategoryController');
Bước 9:
Tại resources >> js >> components ta tạo một thư mục có tên category, trong thư mục này ta tạo một component tên Category.vue và thêm nội dung sau vào:
<template>
<section class="container">
<h1>Category</h1>
<section class="container alert alert-danger col-md-6" v-if="alert!==''">{{alert}}</section>
<section><router-link :to="{name:'StoreCategory'}" class="btn btn-outline-success" style="margin:5px">Add category</router-link></section>
<table class="table">
<thead>
<tr>
<th>ID</th>
<th>Name</th>
<th>Rank</th>
<th>Status</th>
<th>Actions</th>
</tr>
</thead>
<tbody>
<tr v-if="categories.length>0" v-for="cate in categories">
<td>{{cate.id}}</td>
<td><router-link :to="{name:'ShowCategory',params:{id:cate.id}}">{{cate.categoryName}}</router-link></td>
<td>{{cate.categoryRank}}</td>
<td>{{cate.status==1?'Active':'Not active'}}</td>
<td><router-link :to="{name:'UpdateCategory',params:{id:cate.id}}" class="btn btn-outline-info">Edit</router-link> <button class="btn btn-outline-danger" @click="deleteCategory(cate.id)">Delete</button></td>
</tr>
</tbody>
</table>
</section>
</template>
<script>
export default{
data(){
return{
categories:[],
alert:''
}
},
created:function(){
this.showCategory();
},
methods:{
showCategory(){
this.axios.get('/category')
.then((res)=>{this.categories=res.data})
.catch((error)=>{this.alert=error});
},
deleteCategory(id){
if(confirm('Are you sure?')){
this.axios.delete('/category/'+id)
.then((res)=>{this.categories=res.data.categories;this.alert=res.data.alert})
.catch((error)=>{this.alert=error});
}
}
}
}
</script>
Bước 10:
Sửa file resources >> js >> app.js thành như sau:
import Vue from 'vue';
import VueRouter from 'vue-router';
Vue.use(VueRouter);
import VueAxios from 'vue-axios';
import axios from 'axios';
Vue.use(VueAxios,axios);
import App from './components/App.vue';
import Category from './components/category/Category.vue';
const routes = [
{
path:'/',
name:'Category',
component:Category
}
];
const router = new VueRouter({mode:'history',routes:routes});
new Vue(Vue.util.extend({router},App)).$mount('#app');
Những dòng màu đỏ là được thêm mới vào.
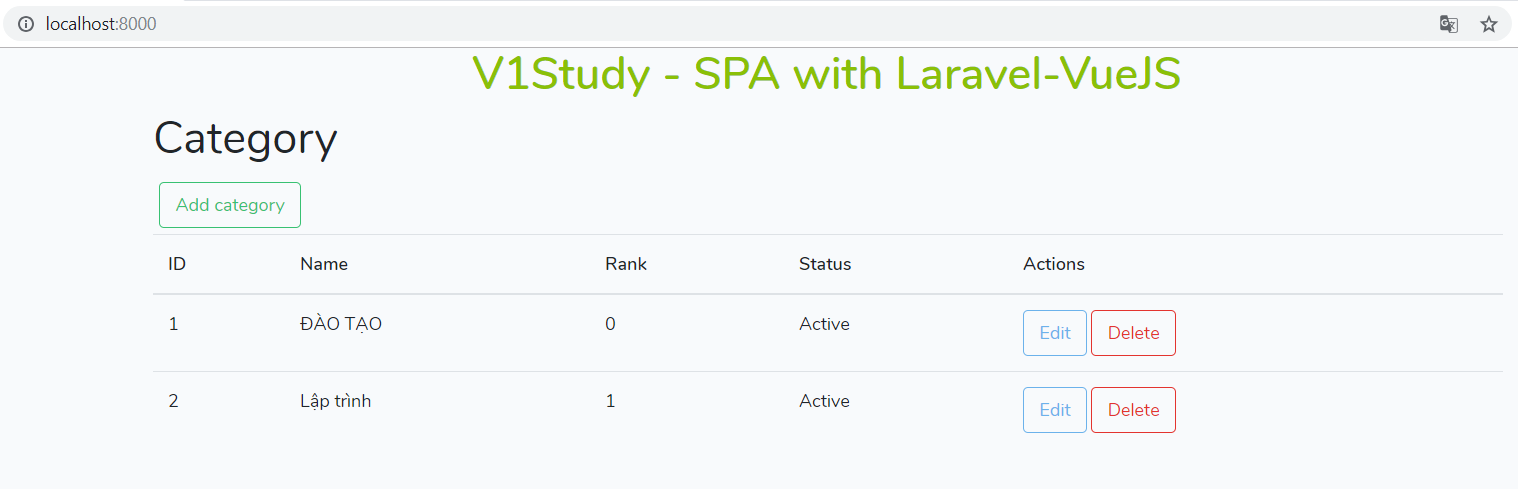
Bước 11:
Quay lại localhost:8000 và refresh, kết quả sẽ như sau:
Trong trường hợp bạn không chạy được và có thể hiện ra lỗi thế này:
Access denied for user 'homestead'@'localhost' (using password: YES) ...
, thì bạn thực hiện lệnh sau để xóa configuration cache cũ:
php artisan config:clear
, rồi bạn quay lại PowerShell nơi thực hiện lệnh php artisan serve để thực hiện lệnh ngắt server bằng cách nhấn tổ hợp phím Ctrl + C rồi thực hiện lại lệnh php artisan serve.
Bước 12: Xóa bản ghi của bảng categories
- Vào controller CategoryController.php và sửa function destroy() thành như sau:
public function destroy(Category $category)
{
$category->delete();
$categories=Category::orderBy('categoryRank')->get();
return response()->json(['categories'=>$categories,'alert'=>"Deleted successfully"]);
}
- Refresh lại trang web và tiến hành xóa, kết quả như sau:

Phần 5: Tạo component StoreCategory.vue để thêm bản ghi
Bước 1:
Từ thư mục resources >> js >> components >> category bạn tạo một component có tên StoreCategory.vue và thêm vào nội dung sau:
<template>
<section class="container col-md-6">
<h1>Add Category</h1>
<section class="alert alert-danger" v-if="alert!==''">{{alert}}</section>
<form @submit.prevent="addCategory">
<section class="form-group">
<label>Name:</label>
<input autofocus required type="text" v-model="category.categoryName" class="form-control">
</section>
<section class="form-group">
<label>Rank:</label>
<input type="number" min="0" max="10000" required v-model="category.categoryRank" class="form-control">
</section>
<section class="form-group">
<input type="submit" value="Add" class="btn btn-outline-success">
</section>
</form>
</section>
</template>
<script>
export default{
data(){
return{
category:{},
alert:''
}
},
methods:{
addCategory(){
this.axios.post('/category',this.category)
.then((res)=>{this.$router.push({name:'Category'})})
.catch((error)=>{this.alert=error});
}
}
}
</script>
Bước 2:
Vào file app.js và thêm vào nội dung màu đỏ như sau:
[...]
import App from './components/App.vue';
import Category from './components/category/Category.vue';
import StoreCategory from './components/category/StoreCategory.vue';
const routes = [
{
path:'/storecategory',
name:'StoreCategory',
component:StoreCategory
},
{
path:'/',
name:'Category',
component:Category
}
[...]
Bước 3:
Quay lại trang web và refresh, nhấn nút Add category ta sẽ được kết quả như sau:

Bước 4:
Mở controller CategoryController.php và sửa function store() thành như sau:
public function store(Request $request)
{
$category=new Category([
'categoryName'=>$request->get('categoryName'),
'categoryRank'=>$request->get('categoryRank')
]);
$category->save();
return response()->json('Added successfully');
}
Bước 5:
Quay về trang chủ (/) và refresh trang web rồi nhấn nút Add category để thêm một vài bản ghi. Kết quả:

Phần 6: Tạo component UpdateCategory.vue để sửa bản ghi
Bước 1:
Từ resources >> js >> components >> category tạo một component UpdateCategory.vue và đưa vào nội dung sau:
<template>
<section class="container col-md-6">
<h1>Edit Category</h1>
<section class="alert alert-danger" v-if="alert!==''">{{alert}}</section>
<form @submit.prevent="updateCategory">
<section class="form-group">
<label>Name:</label>
<input type="text" v-model="category.categoryName" class="form-control">
</section>
<section class="form-group">
<label>Rank:</label>
<input type="number" min="0" max="10000" v-model="category.categoryRank" class="form-control">
</section>
<section class="form-group">
<input type="submit" value="Update" class="btn btn-outline-success">
</section>
</form>
</section>
</template>
<script>
export default{
data(){
return{
category:{},
alert:''
}
},
created:function(){
this.getCategory();
},
methods:{
getCategory(){
let uri='/category/'+this.$route.params.id+'/edit';
this.axios.get(uri).then((res)=>{this.category=res.data});
},
updateCategory(){
let uri='/category/'+this.$route.params.id;
this.axios.put(uri,this.category)
.then((res)=>{this.$router.push({name:'Category'})})
.catch((err)=>{this.alert=err});
}
}
}
</script>
Bước 2:
Vào file app.js và thêm vào nội dung màu đỏ như sau:
[...]
import App from './components/App.vue';
import Category from './components/category/Category.vue';
import StoreCategory from './components/category/StoreCategory.vue';
import UpdateCategory from './components/category/UpdateCategory.vue';
const routes = [
{
path:'/updatecategory/:id',
name:'UpdateCategory',
component:UpdateCategory
},
{
path:'/storecategory',
name:'StoreCategory',
component:StoreCategory
},
{
path:'/',
name:'Category',
component:Category
}
[...]
Bước 3:
Mở controller CategoryController.php và sửa function edit() thành như sau:
public function edit(Category $category)
{
return response()->json($category);
}
Bước 4:
Quay về trang chủ (/) và refresh trang web rồi nhấn nút Edit trên một bản ghi bất kỳ để sửa bản ghi. Kết quả:

Bạn thử thay đổi Rank thành 234 rồi nhấn nút Update để sửa, kết quả là bạn sẽ không sửa được. Ta thực hiện bước sau để update.
Bước 5:
Sửa function update() trong CategoryController.php thành như sau:
public function update(Request $request, Category $category)
{
$category->update($request->all());
return response()->json();
}
Bước 6:
Refresh lại trang rồi thực hiện lại việc edit bằng cách nhấn vào nút Edit, sửa rank thành 234 và nhấn nút Update. Kết quả:

Phần 7: Tạo component ShowCategory.vue để xem bản ghi
Bước 1:
Từ resources >> js >> components >> category tạo một component ShowCategory.vue và đưa vào nội dung sau:
<template>
<section class="container col-md-6">
<h1>Show Category:{{errors}}</h1>
<section class="alert alert-danger" v-if="alert!==''">{{alert}}</section>
<section class="form-group">
{{category.categoryName}}
</section>
<section class="form-group">
{{category.categoryRank}}
</section>
<section class="form-group">
{{category.status==1?'Active':'Not active'}}
</section>
</section>
</template>
<script>
export default{
data(){
return{
category:{},
alert:''
}
},
created:function(){
this.showCategory();
},
methods:{
showCategory(){
let uri='/category/'+this.$route.params.id;
this.axios.get(uri)
.then((res)=>{this.category=res.data})
.catch((err)=>{this.alert=err});
}
}
}
</script>
Bước 2:
Vào file app.js và thêm vào nội dung màu đỏ như sau:
[...]
import App from './components/App.vue';
import Category from './components/category/Category.vue';
import StoreCategory from './components/category/StoreCategory.vue';
import UpdateCategory from './components/category/UpdateCategory.vue';
import ShowCategory from './components/category/ShowCategory.vue';
const routes = [
{
path:'/showcategory/:id',
name:'ShowCategory',
component:ShowCategory
},
{
path:'/updatecategory/:id',
name:'UpdateCategory',
component:UpdateCategory
},
{
path:'/storecategory',
name:'StoreCategory',
component:StoreCategory
},
{
path:'/',
name:'Category',
component:Category
}
];
[...]
Bước 3:
Mở controller CategoryController.php và sửa function show() thành như sau:
public function show(Category $category)
{
return response()->json($category);
}
Bước 4:
Quay về trang chủ (/) và refresh trang web rồi nhấn vào tên của category (Công nghệ chẳng hạn), ta được kết quả:

Link trải nghiệm: Chính v1study.com
Kết thúc.
Giải phóng thời gian, khai phóng năng lực